You are in our US store • Switch to Europe store

Dream Big Mixed Media Tag

Hey everybody, happy weekend! Are you a fan of mixed media? Well, I love it but don’t play as often as I would like and need to change that. Leslie here, sharing a Dream Big Mixed Media Tag featuring pretty papers, die cuts/ephemera and dies from Uniquely Creative. Of course, I also used some amazing adhesives (and other products) from Scrapbook Adhesives! Let me show you this tag in a little more detail!
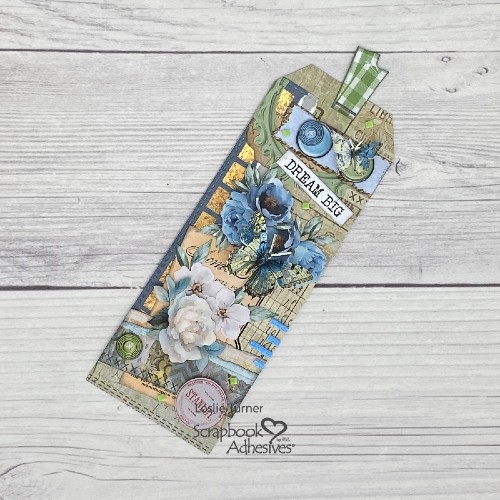
Dream Big Mixed Media Tag by Leslie Turner for Scrapbook Adhesives by 3L

Mixed Media Tag Details

Using a Uniquely Creative Slim Stitched Nesting Tag Die, I cut the tag base from Kraft cardstock. Then the fun began. First I layered patterned paper, cardstock, die cuts and other pieces of ephemera from the Uniquely Creative Delighted Curiosities collection. The E-Z Runner® Grand Permanent Strips Refillable Dispenser and Dual Tip Glue Pen worked well for the base layers.
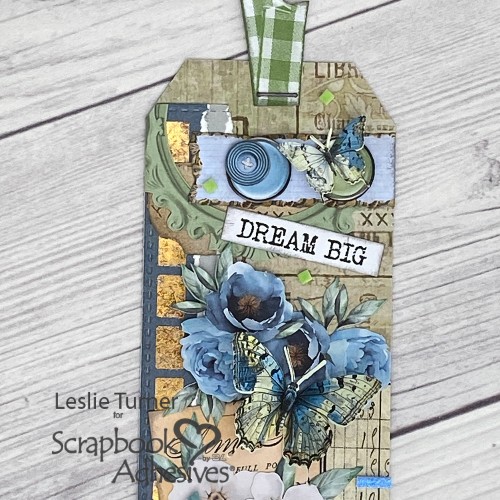
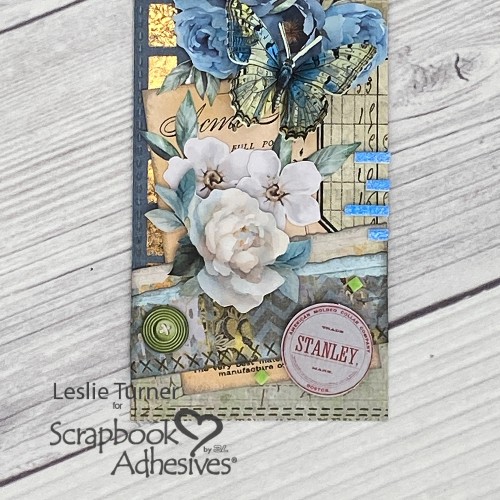
Next, I inked the edges of some of the pieces with Ranger Hickory Smoke distress ink on a dauber. Popping up elements with Thin 3D Foam Squares White Mix and 3D Foam Squares White Mix is always a fun touch. These are 1mm and 2mm thick respectively and give different heights of dimension.
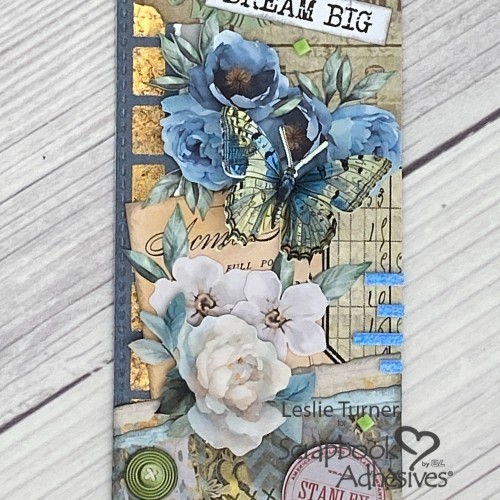
Dream Big Mixed Media Tag by Leslie Turner for Scrapbook Adhesives by 3L

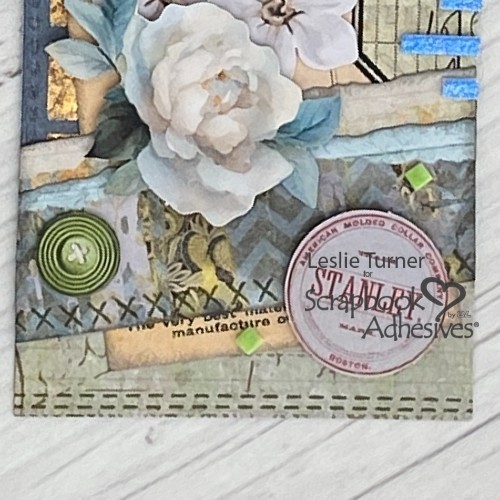
Additionally, I used a sewing-themed stamp to add random cross-stitches and double-stitches in green ink using an acrylic block.
Wear Your Adhesive on the Outside Technique

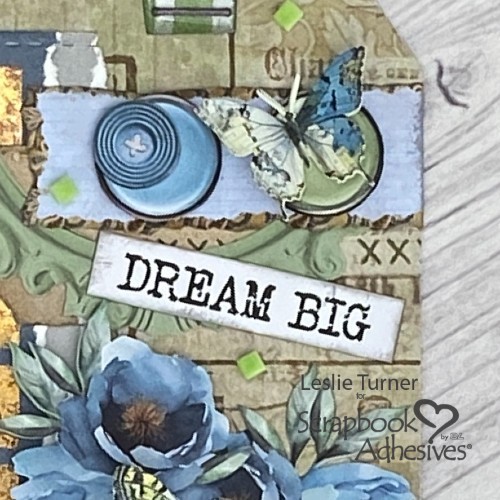
Oh, how I love the Wear Your Adhesive on the Outside technique! Surprisingly (NOT), I used it three times on this tag – first with a strip of foiled squares down the left side. Created this with E-Z Squares® Refillable Dispenser and foil from the Metallic Transfer Foil Sheets Nature Colors. Simply apply the squares, place crumpled bronze foil (shiny side up) on the squares and rub with your finger. Repeat the process with crumpled brown foil to grab any bare areas which will yield a two-tone look.

The second instance was the application of green flock onto several 3D Foam Squares Micro White. These were then placed in diamond orientation in random spots on the tag.
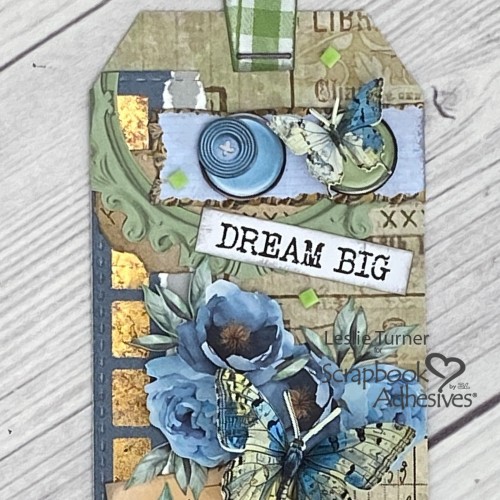
Dream Big Mixed Media Tag by Leslie Turner for Scrapbook Adhesives by 3L

Finally, the third instance was blue embossing powder applied to 3D Foam Strips and heated with my heat tool. Afterwards, I cut the strip in small-sized pieces and placed them on the right edge toward the bottom. This completed the Dream Big mixed media tag.
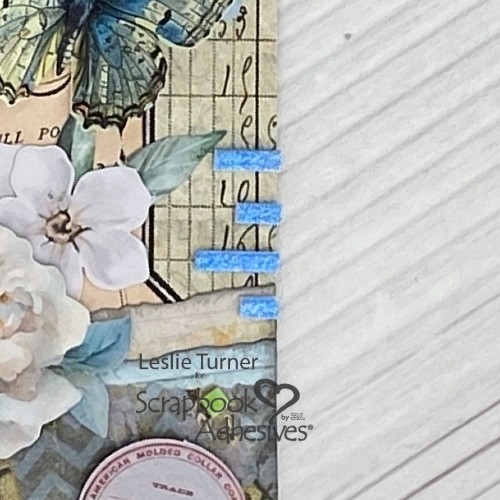
Dream Big Mixed Media Tag by Leslie Turner for Scrapbook Adhesives by 3L

Thanks for visiting!
Leslie

Creative Time: 60 mins
Skill Level: Intermediate

Materials Needed:
Scrapbook Adhesives by 3L®
E-Z Runner® Grand Permanent Strips Refillable Dispenser
Thin 3D Foam Squares White Mix
3D Foam Squares White Mix
E-Z Squares® Refillable Dispenser
Metallic Transfer Foil Sheets Nature Colors
3D Foam Squares Micro White
3D Foam Strips

HomeHobby™ by 3L
Dual Tip Glue Pen

Other: Cardstock/Paper: CutCardStock Glama Brown Kraft cardstock; Uniquely Creative Delighted Curiosities 12×12 Collection Pack, Coordinating Cardstock Bundle, Creative Cuts, and Curiosities Ephemera
Stamps: Keep It Simple Cheerful Cottage stamp set
Ink: Ranger Hickory Smoke distress ink, Memento Olive Grove ink
Dies/Punches: Uniquely Creative Slim Stitched Nesting Tag Die
Accessories: Fiskars 12″ ProCision Rotary Bypass Paper Trimmer, Big Shot, dauber, acrylic block, green flocking, Inkadinkadoo Sky Blue embossing powder, Milwaukee heat tool

Click Preferred Retailers List

Save to Pinterest!
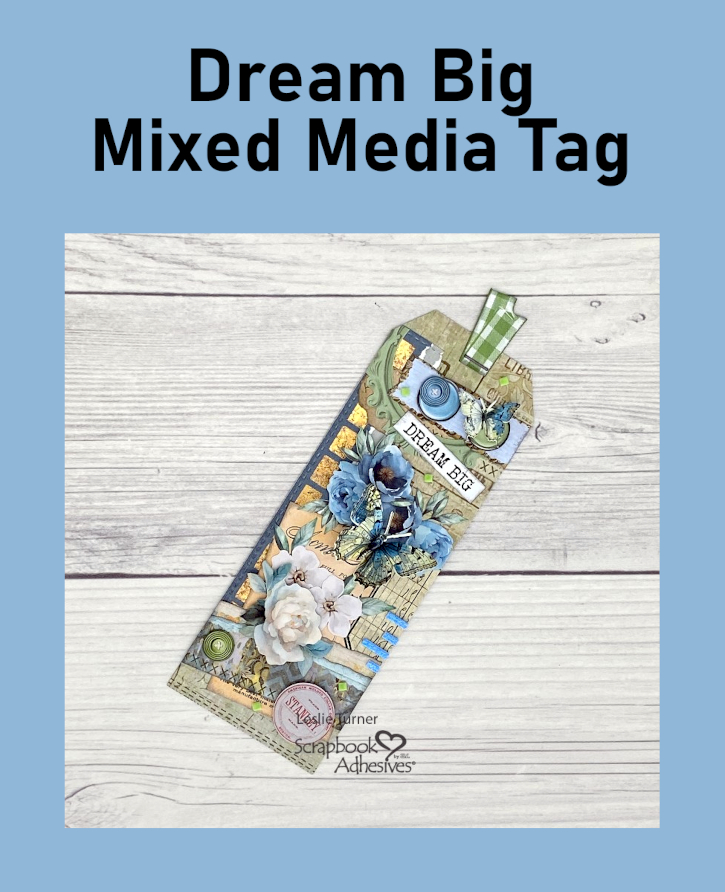
Dream Big Mixed Media Tag by Leslie Turner for Scrapbook Adhesives by 3L Pinterest

Rolodex Index Card Art

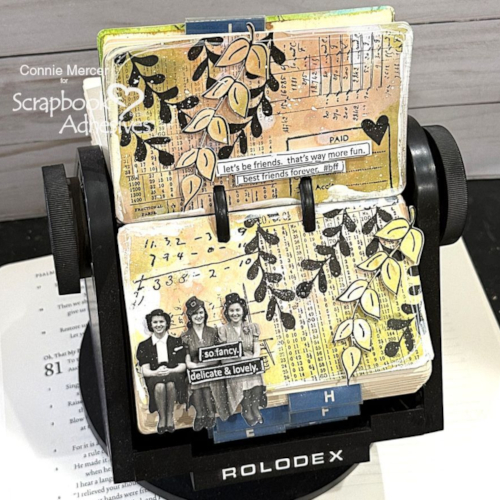
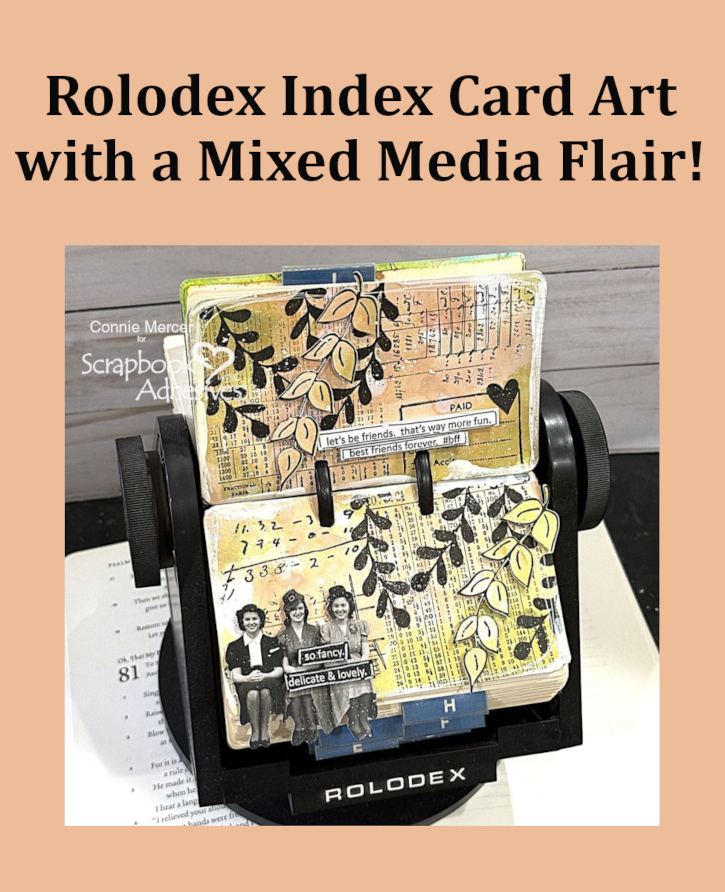
Hi there!!! Connie here with a really fun repurposing project, Rolodex Index Card Art, using a vintage Rolodex and the E-Z Runner Grand Refillable Dispenser. I call them art index cards and I love creating them and adding them to the Rolodex. The inspiration comes from every where.

Rolodex Index Card Art by Connie Mercer for Scrapbook Adhesives by 3L

Rolodex Index Card Background

Rolodex Index Card Art by Connie Mercer for Scrapbook Adhesives by 3L

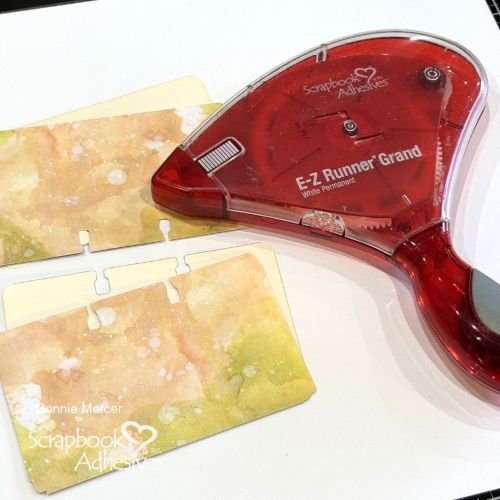
  1. Create a background on an old index card from a Rolodex file. OR You can also make your own card container and add them to a decorated box if you don’t have a Rolodex. I used Designer Paper, with a Mixed Media vibe, to cover the index card. The E-Z Runner Grand Refillable Dispenser was perfect for the task. Love the coverage and so fast!!!
  2. Using your favorite images, stamp in random spots and add interest to the art index cards.

Prep the Die Cut Images

Rolodex Index Card Art by Connie Mercer for Scrapbook Adhesives by 3L

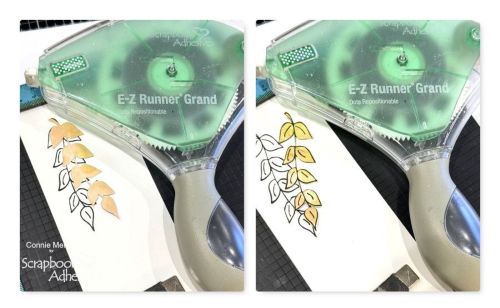
Stamp the branch image, on white cardstock, using a stamping platform.  Die cut the image, lay over
the stamped pattern and close the lid to the stamping platform, stamping the branch on the die cut.
The E-Z Runner Grand Dots Repositionable makes sure the branch doesn’t move when you stamp over the die cut.

Assemble Index Cards

Rolodex Index Card Art by Connie Mercer for Scrapbook Adhesives by 3L

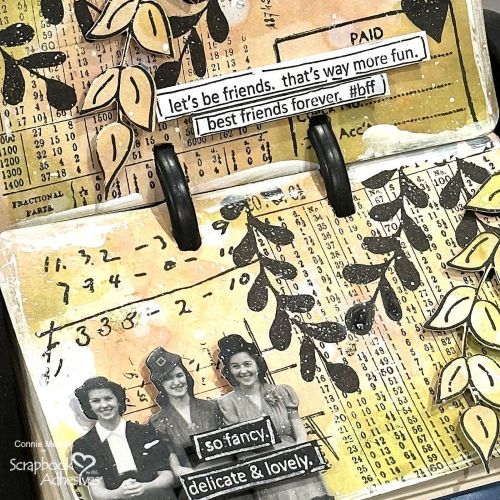
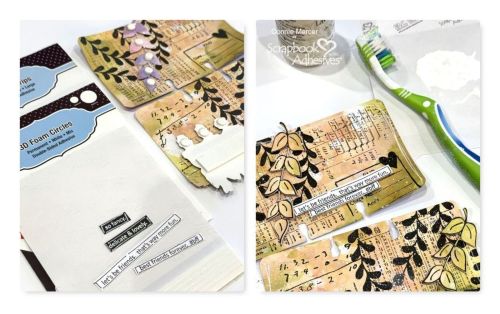
  1. Add the paper dolls and die cut leaf branches to the front of the index cards using 3D Foam Strips White Large and 3D Foam Circles White Mix.
  2. Attach the sentiment strips with 3D Foam Strips White and 3D Foam Strips Black.
  3. Complete the index cards by adding white acrylic paint splatters, to front of index cards, and finger smears along the edges. I also used a white Posca marker to outline the edges.

Designer Tip: The adhesive release sheet (from the 3D Foam products) make a great paint pallet when mixing paint to splatter, along with an old toothbrush.

Rolodex Index Card Art by Connie Mercer for Scrapbook Adhesives by 3L

Can’t wait to fill the Rolodex with art. I’ll keep you posted.

Thanks for stopping by.
Connie Mercer

Creative Time: 60 mins
Skill Level: Intermediate

Materials Needed:
Scrapbook Adhesives by 3L®
E-Z Runner Grand Refillable Dispenser, E-Z Runner Grand Dots Repositionable Dispenser, 3D Foam Strips White Large, 3D Foam Circles White Mix and 3D Foam Strips White and Black.

Other: Papers, Stickers + Ephemera: Blue Knight Stamps (Designer Paper: Mixed Media 2); Stamp: Blue Knight Stamps (Background Branches, Friends Rock, Numbers Set), Darkroom Door (Number Medley); Ink: Versafine (Black Onyx); Craft Dies: Blue Knight Stamps (Background Branches).

Click Preferred Retailers List

Save to Pinterest!
Rolodex Index Card Art by Connie Mercer for Scrapbook Adhesives by 3L Pinterest

Visit our Website and Blog!
Sign up for our Newsletter so you never miss a contest or giveaway!

instagram purple icon facebook icon purple pinterest purple icon twitter purple icon YouTube icon blog subscription purple icon

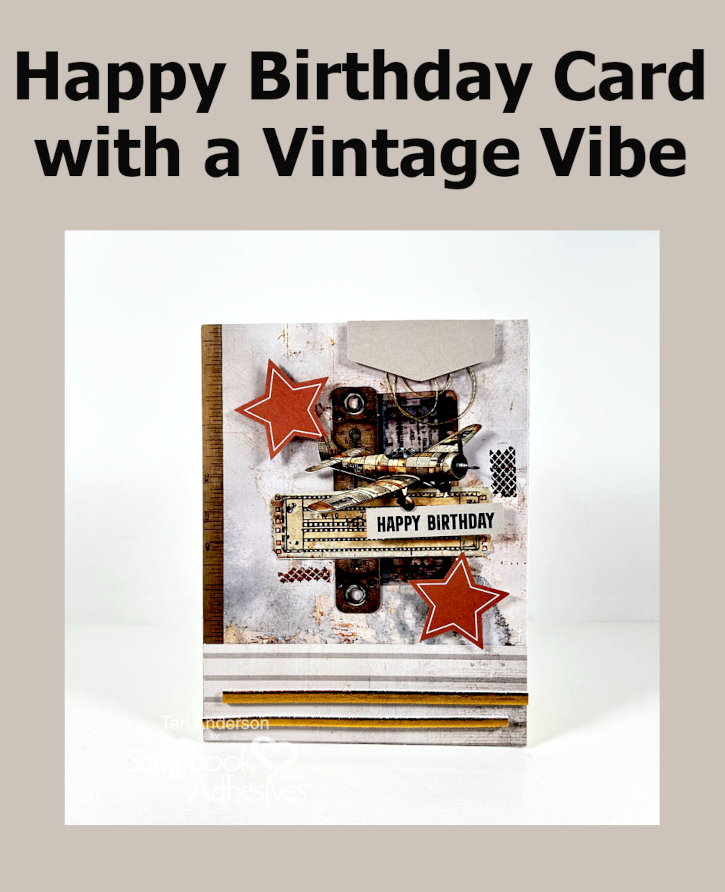
Birthday Card with a Vintage Vibe

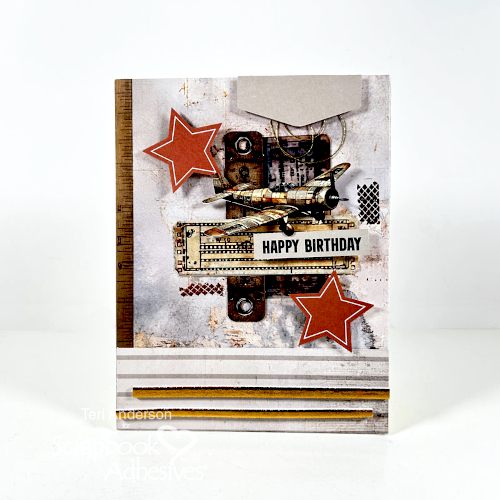
Hi, friends! Do you struggle to make cards for guys? Teri here to show you to quickly put together one, a Birthday Card with a Vintage Vibe to solve that issue! For interest and dimension, throw in some 3D Foam and Metallic Transfer Foil Sheets. You’ll end up with a card that’s sure to wow the recipient.

Birthday Card with a Vintage Vibe by Teri Anderson for Scrapbook Adhesives by 3L

Gather Materials for the Vintage Vibe Birthday Card

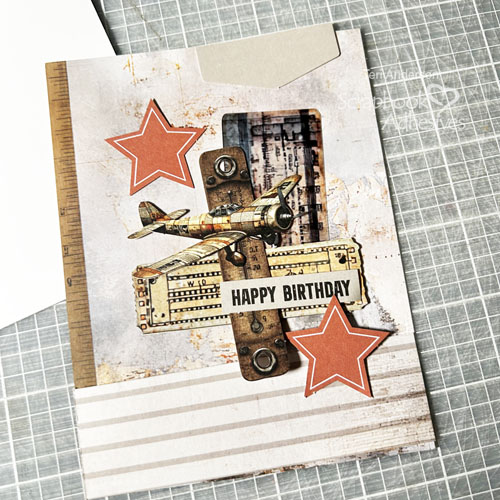
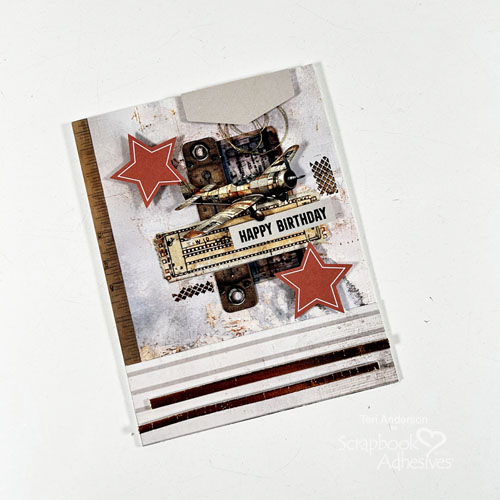
Pick out the patterned papers that are more muted or earthy tones. With the die-cut elements, I chose to items like tickets, old-style stars, planes and other vintage-inspired items. Create a card base from cardstock. Cover it with a couple patterned papers. Designer’s Tip: Arrange items are on card to determine placement and clusters. Snap a photo with your phone so you can remember the design later.

Assemble the Card Front

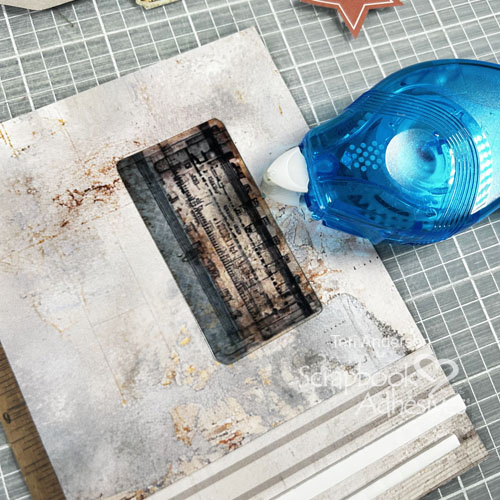
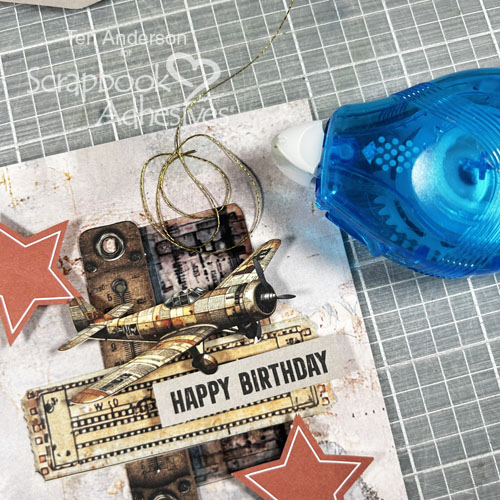
Cluster a few of the die-cuts and adhere them to the card. If any of them are made from acetate, roll a E-Z Runner® Petite Permanent Dots Refillable Dispenser onto the card, leaving a line of adhesive. Mount the element right on top.

Let’s bring the remaining elements to life by using 3D Foam Strips and 3D Foam Strips 3mm White under them to pop them up. The 3mm strips have the most height with just under 1/8″ and the other strips are 1/16″ at 2mm.

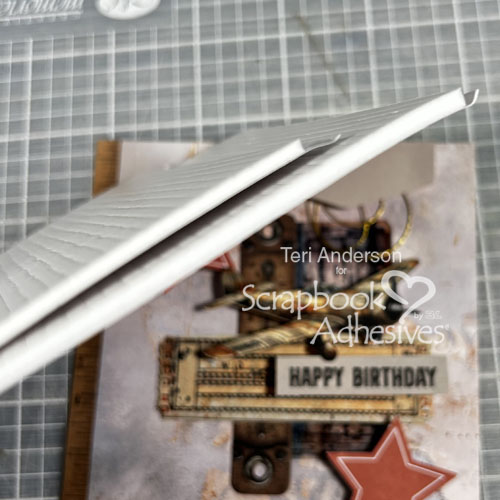
Roll some adhesive from the E-Z Runner® Petite Permanent Dots Refillable Dispenser close to the top of the card. Next, bunch up some metallic floss and place it on top. Take a die-cut tap and cover it on top with 3D Foam Strips.

Birthday Card with a Vintage Vibe by Teri Anderson for Scrapbook Adhesives by 3L

Wear Your Adhesive on the Outside with 3D Foam Strips

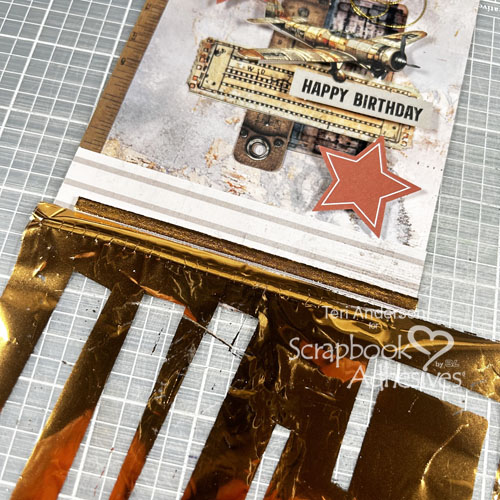
Adhere 3D Foam Strips to the bottom of your card to create a border. Set Metallic Transfer Foil on top of them with the pretty side up. Burnish the foil onto the strips.

Birthday Card with a Vintage Vibe by Teri Anderson for Scrapbook Adhesives by 3L

Add a “faux” distressed look to your card by rolling adhesive on it, around the die-cuts. Add some foil to the adhesive.

Birthday Card with a Vintage Vibe by Teri Anderson for Scrapbook Adhesives by 3L

I hope you enjoyed today’s project and are inspired to make a card for your favorite guy!

Happy Creating!

Teri Anderson

Creative Time: 45 minutes

Skill Level: Beginning

Materials needed:

Scrapbook Adhesives by 3L®:

3D Foam Strips 3mm White and 3D Foam Strips

E-Z Runner® Petite Permanent Dots Refillable Dispenser

Metallic Transfer Foil Sheets Nature Colors

Other: Cardstock: Neenah (White); Patterned Paper, Die-cuts: Uniquely Creative (Wings & Wheels Collection); Acetate Shape: Uniquely Creative (Essential Ephemera Pack); Gold Floss: DMC

Click Preferred Retailers List

Save to Pinterest!
Birthday Card with a Vintage Vibe by Teri Anderson for Scrapbook Adhesives by 3L Pinterest

Visit our Website and Blog!
Sign up for our Newsletter so you never miss a contest or giveaway!

instagram purple icon facebook icon purple pinterest purple icon twitter purple icon YouTube icon blog subscription purple icon

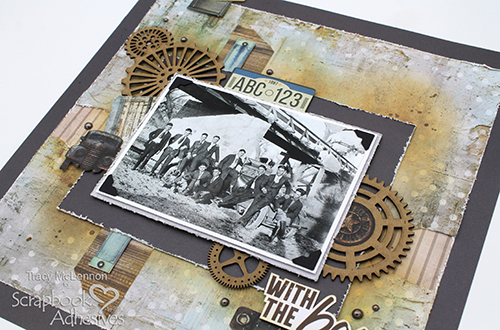
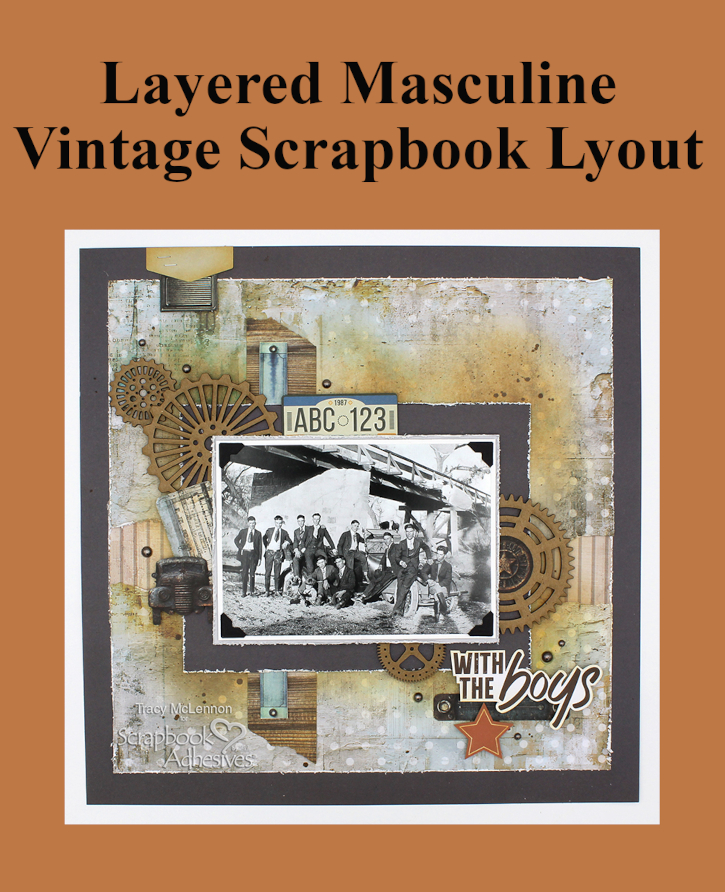
Masculine Vintage Layout

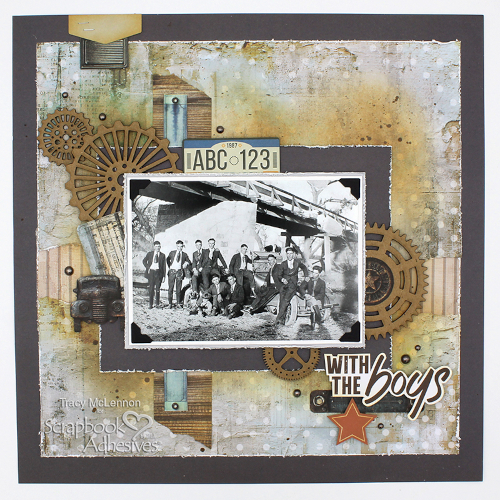
Hello scrappy friends! Tracy here, and today I have a layered Masculine Vintage Layout to share featuring amazing products from our friends at Uniquely Creative

Masculine Vintage Layout by Tracy McLennon for Scrapbook Adhesives by 3L

Let’s Get Started!

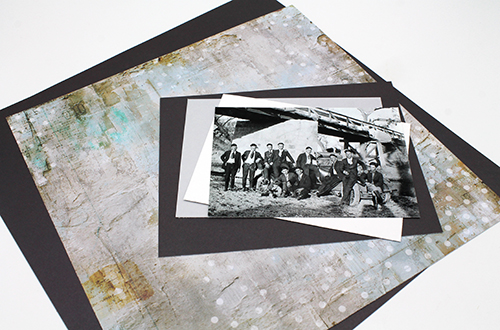
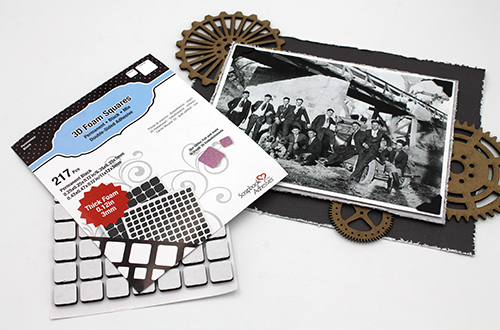
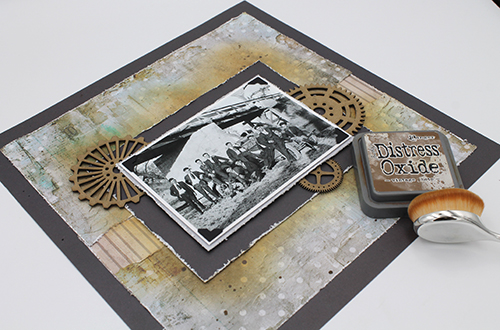
I always start a layout by choosing the layout base and coordinating cardstock for matting my photo. The patterned paper background is cut to 10.75″ square. I matted my photo in white and light grey cardstock, and then a larger mat of the dark grey cardstock. Dark grey cardstock is also the base of the layered vintage layout.

Masculine Vintage Layout by Tracy McLennon for Scrapbook Adhesives by 3L

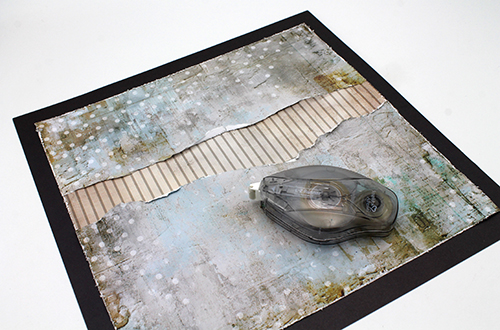
Tear a strip out of the middle of the patterned paper. Distress the edges of all of the sides. Cut a strip of striped patterned paper to go under the torn area. Adhere all of these layers together using E-Z Runner® Ultra Strong Refillable Dispenser.

Masculine Vintage Layout by Tracy McLennon for Scrapbook Adhesives by 3L

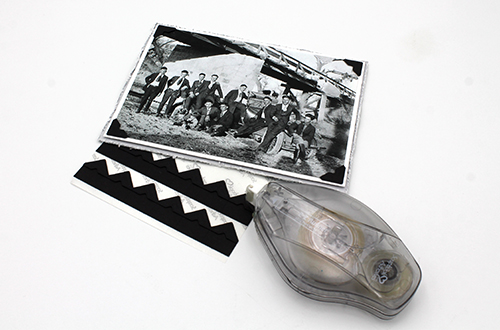
Distress the edges of all of the photo mats. Adhere the photo to the first mated using Creative Photo Corners Black. Adhere the next layer using E-Z Runner® Ultra Strong Refillable Dispenser.

Masculine Vintage Layout by Tracy McLennon for Scrapbook Adhesives by 3L

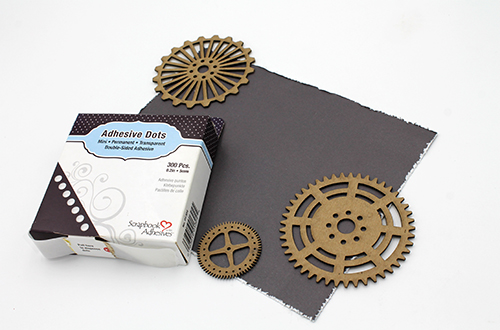
Add some chipboard gears to the largest cardstock photo mat using Adhesive Dots Mini. A perfect addition to this layered vintage layout.

Masculine Vintage Layout by Tracy McLennon for Scrapbook Adhesives by 3L

Attach the matted photo to the chipboard layer using the 3D Foam Squares 3mm Black Mix. These foam squares are the perfect thickness to create dimension around the chipboard pieces of the layered vintage layout.

Masculine Vintage Layout by Tracy McLennon for Scrapbook Adhesives by 3L

Add Some Vintage Color

Using distress ink and stain, add some colour to the background patterned paper to frame the matted photo piece. Adhere the matted photo piece to the background using Crafty Foam Tape Black.

Masculine Vintage Layout by Tracy McLennon for Scrapbook Adhesives by 3L

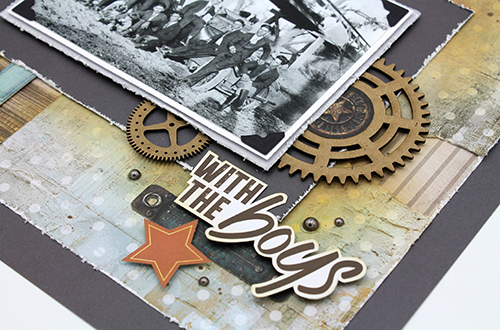
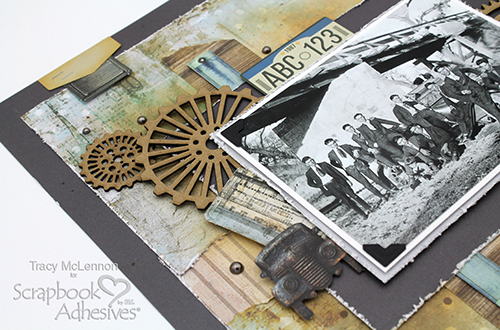
The next steps are to add all of the little bits of coordinating ephemera. Attach the title sentiment to the layered vintage layout using 3D Foam Strips 3mm Black. Add the other bits and pieces using a combination of 3D Foam Squares 3mm Black Mix and Thin 3D Foam Squares Black Mix for lots of dimension between layers.

Masculine Vintage Layout by Tracy McLennon for Scrapbook Adhesives by 3L

Add a few chocolate colored pearls around the layout for just a bit of shine for this layered vintage layout.

Thanks so much for stopping by!
Tracy

Creative Time: 30 mins
Skill Level: Advanced

Materials Needed:
Scrapbook Adhesives by 3L®
E-Z Runner® Ultra Strong Refillable Dispenser
3D Foam Squares 3mm Black Mix
3D Foam Strips 3mm Black
Creative Photo Corners Black
Adhesive Dots Mini
Thin 3D Foam Squares Black Mix
Crafty Foam Tape Black

Other: Patterned Papers: Uniquely Creative (Wings & Wheels Collection); Ink: Ranger Ink (Distress Oxide Ink in Vintage Photo and Distress Spray Stain in Vintage Photo); Blending Brush; White Cardstock; Paper Distress Tool; Pearls; Creative Embellishments Chipboard

Save to Pinterest!

Masculine Vintage Layout by Tracy McLennon for Scrapbook Adhesives by 3L Pinterest

Visit our Website and Blog!
Sign up for our Newsletter so you never miss a contest or giveaway!

instagram purple icon facebook icon purple pinterest purple icon twitter purple icon YouTube icon blog subscription purple icon

Life Documented Layout

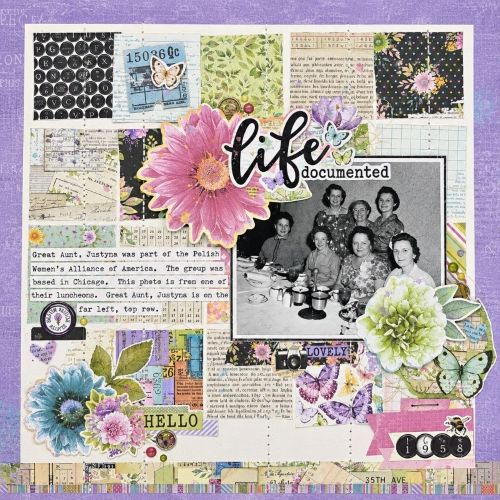
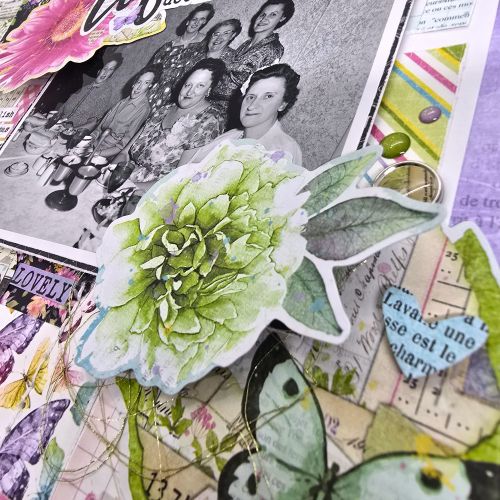
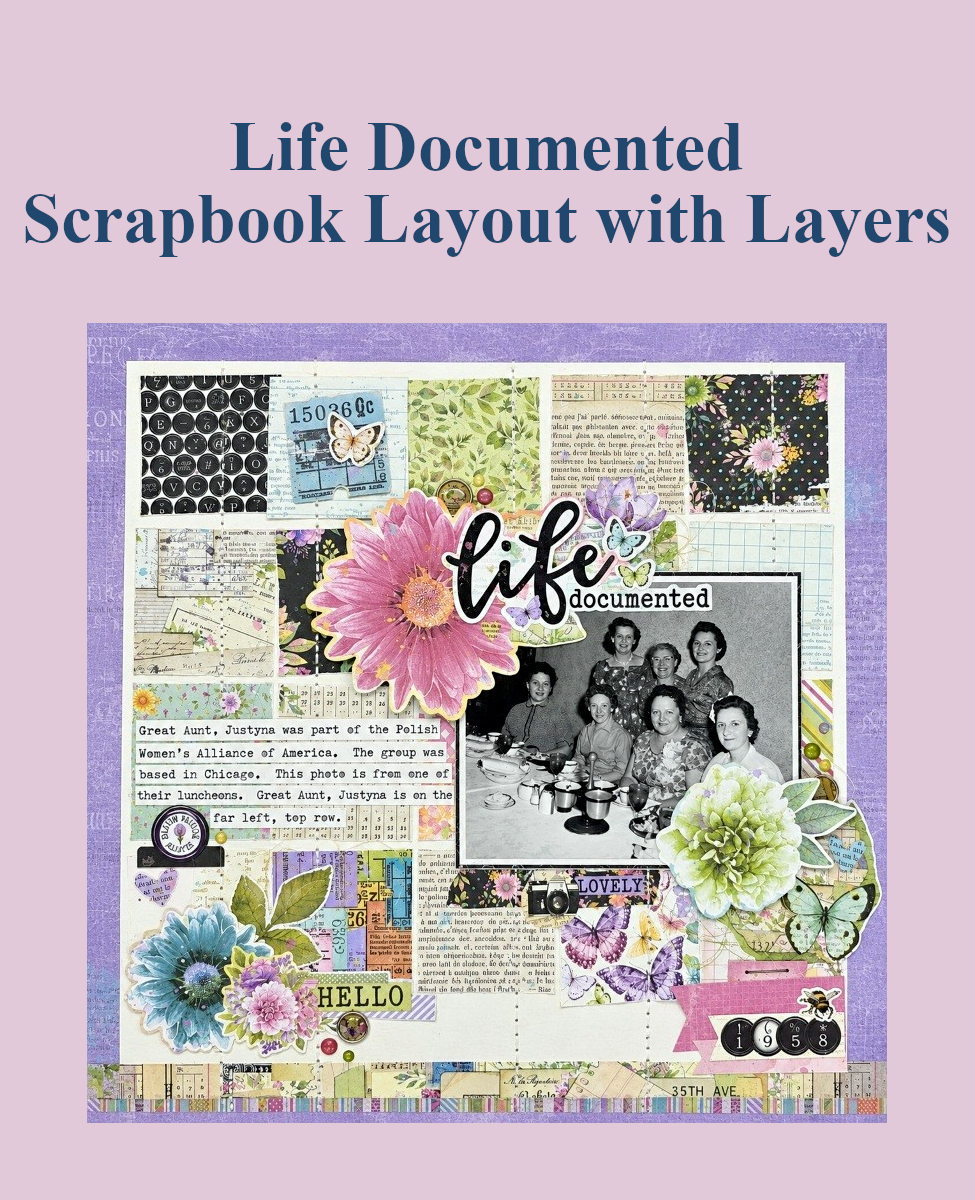
Hello, Kristin – I’m here to share a 12×12″ Life Documented Layout showcasing a photo of my Great Aunt Justyna and friends at a luncheon. I used my favorite adhesives from Scrapbook Adhesives by 3L and a beautiful paper line by Simple Stories.

Life Documented Layout by Kristin Rizzo for Scrapbook Adhesives by 3L

Creating the Background

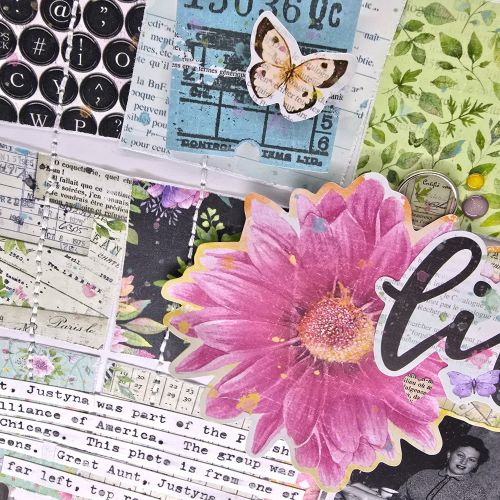
I started with a sheet of patterned paper from the Simple Stories, Simple Vintage Life in Bloom collection. The soft purple background creates a pretty frame around the rest of the page. Next, I added several pieces of coordinating patterned paper to a sheet of white cardstock using the E-Z Runner® Micro Refillable Dispenser. I put a strip of adhesive on each square so that I could hand-stitch vertically through each square. I love how this created a layered collage behind the photo.

Life Documented Layout by Kristin Rizzo for Scrapbook Adhesives by 3L

Adding the Photo and Embellishments

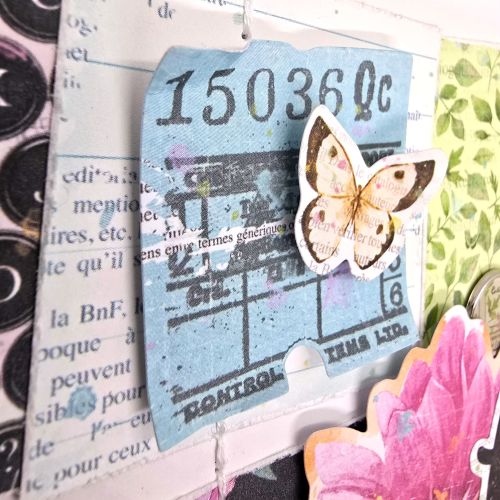
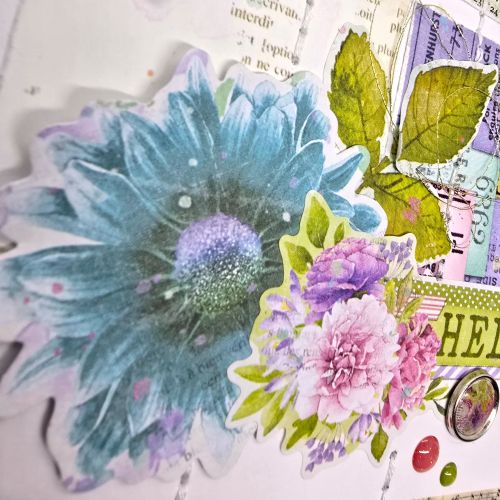
I added several butterflies, flowers, vintage labels, button stickers, and other embellishments. For even more dimension, I used 3D Foam Squares White Mix to lift several of the embellishments from the page. To make sure that photo was well adhered to the photo mat, I used the E-Z Runner® Ultra Strong Refillable Dispenser.

Finishing Touches

The combination of vintage patterns, florals, butterflies, and soft colors gives this scrapbook page a beautiful heirloom feel. To give the page a small bit of sparkle, I tucked some gold thread behind a few of the embellishment clusters. Using Scrapbook Adhesives by 3L® foam and adhesive made it easy to securely attach my layers while adding dimension to the design.

Life Documented Layout by Kristin Rizzo for Scrapbook Adhesives by 3L

Thank you for visiting! 💕✂️
Kristin Rizzo

Creative Time: 75 mins
Skill Level: Intermediate

Materials Needed:
Scrapbook Adhesives by 3L®

E-Z Runner® Ultra Strong Refillable Dispenser, E-Z Runner® Micro Refillable Dispenser, 3D Foam Squares White Mix

Other: Patterned Paper & Embellishments: Simple Stories, Simple Vintage Life in Bloom. Cardstock, gold thread, typewriter & white embroidery thread from my stash.

Click Preferred Retailers List

Save to Pinterest!
Life Documented Layout by Kristin Rizzo for Scrapbook Adhesives by 3L Pinterest

Visit our Website and Blog!
Sign up for our Newsletter so you never miss a contest or giveaway!

instagram purple icon facebook icon purple pinterest purple icon twitter purple icon YouTube icon blog subscription purple icon

Any Occasion Botanical Card

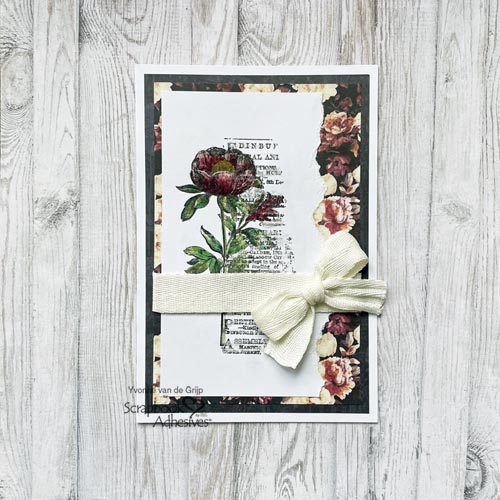
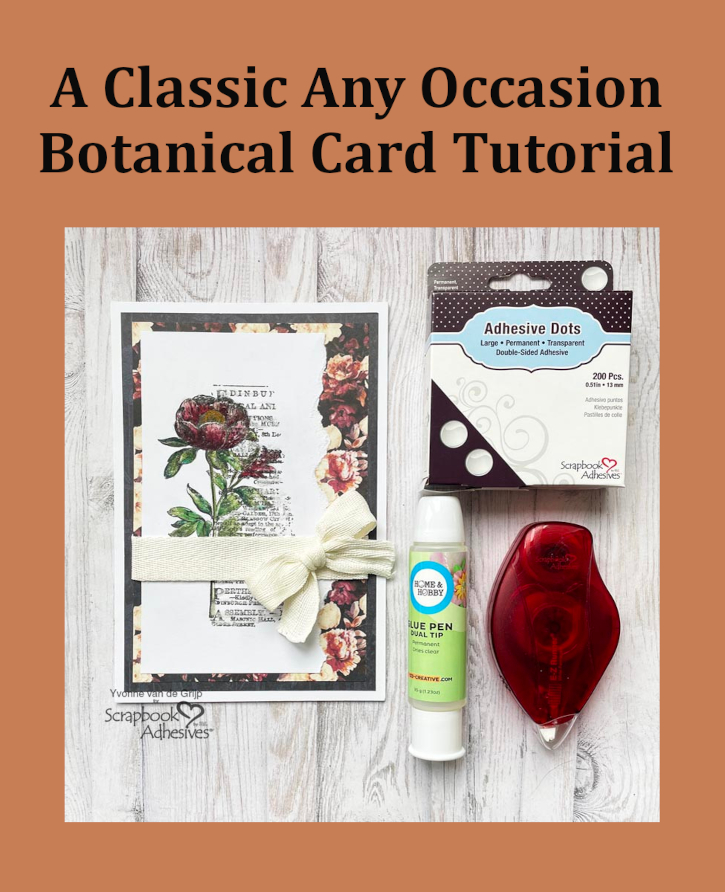
Hi everyone, Yvonne here with a classic Any Occasion Botanical Card. Sometimes you just need a card to cover most occasion. With a subtle detail like adding some sparkle, it can make a card. So, let me share how.

Any Occasion Botanical Card by Yvonne van de Grijp for Scrapbook Adhesives by 3L

Stamp and Color Top Panel of the Botanical Card

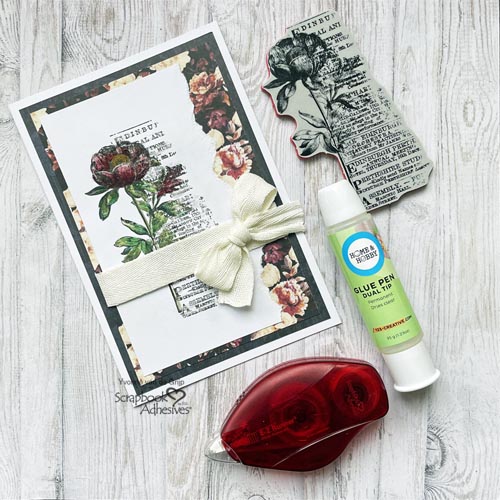
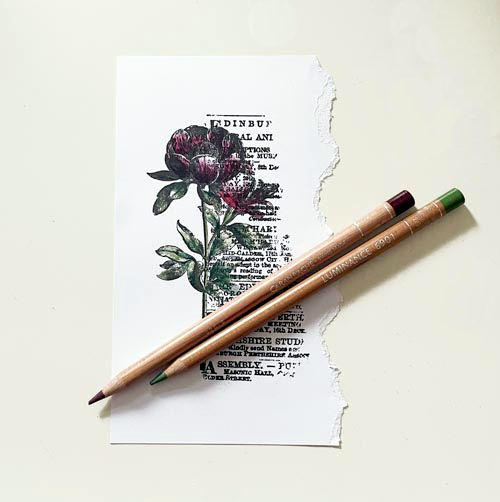
Cut a rectangle white cardstock panel and tear on the left side, leaving space for a stamp design. Stamp the botanical image with a black ink and color the image using color pencils.

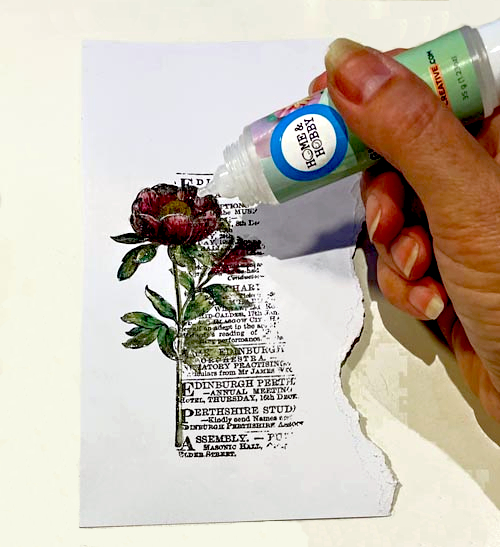
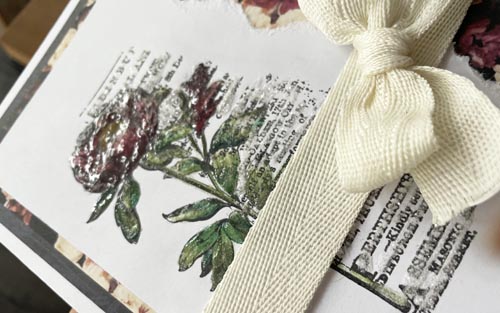
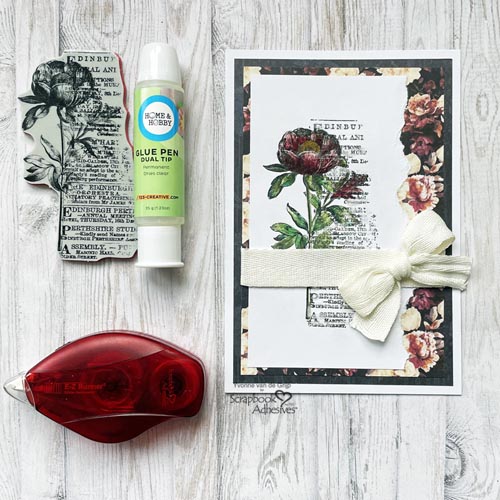
To add a subtle detail on the Any Occasion Botanical Card, I used the Dual Tip Glue Pen over the flower and leaves. The fine tip is perfect for precise placement of the glue. Next sprinkle clear embossing powder over the wet glue and tap off the excess. Let dry. Use a heat tool to melt the embossing powder for that sparkle!

Repeat the sparkle accent steps with the stamped text using the clear glitter instead of the embossing powder (minus the heat tool).

Card Base

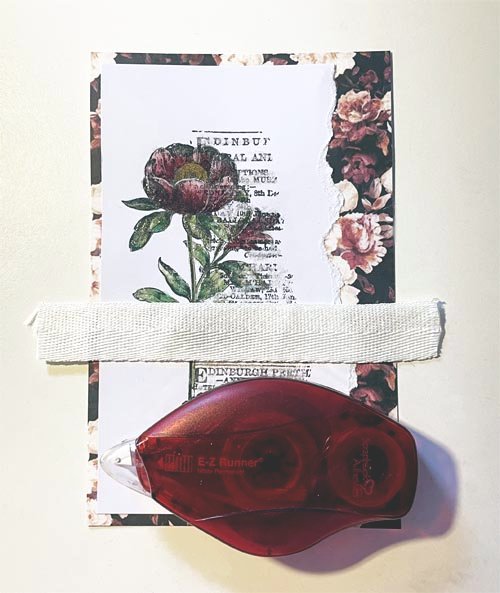
Mat the card panel to a darker color patterned rectangle piece slightly larger than the panel with the E-Z Runner® Permanent Strips Refillable Dispenser. Wrap the ribbon around the matted panel and secure the ends with the same adhesive. Then adhere on a white card base.

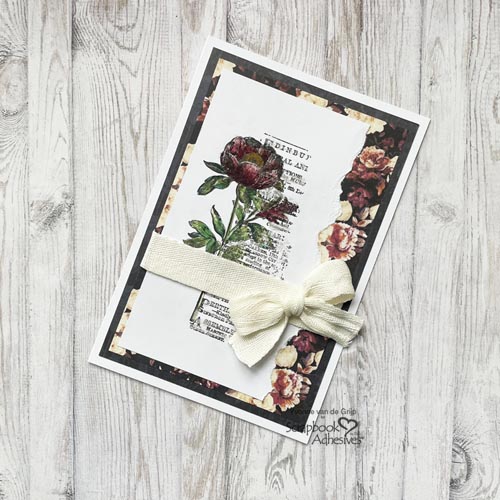
Any Occasion Botanical Card by Yvonne van de Grijp for Scrapbook Adhesives by 3L

The Finishing Touch

Tie a bow and secure it with Adhesive Dots Large. It’s perfect because no adhesive shines through.

Any Occasion Botanical Card by Yvonne van de Grijp for Scrapbook Adhesives by 3L

And voilá, the Any Occasion Botanical Card is ready. I hope you enjoyed the tutorial and wish you happy crafting

Yvonne van de Grijp

Creative Time: 50 minutes

Skill Level: Intermediate

Materials needed:

Scrapbook Adhesives by 3L®:

E-Z Runner® Permanent Strips Refillable Dispenser

Adhesive Dots Large

HomeHobby™ by 3L:

Dual Tip Glue Pen

Other: Cardstock (White, Photoplay™: Midnight Garden Collection Pack); Stamp: (Stampers Anonymous: Tim Holtz® Collection: Botanical Collage);  Glitter (Tim Holtz®: Distress Stickles™: Dry Glitter: Clear Rock Candy); Embossing powder (Ranger: Ultra Thick Embossing Powder: Clear); Heat Tool; Ribbon (Creme); Paper Trimmer; Scissors

Save to Pinterest!

Any Occasion Botanical Card by Yvonne van de Grijp for Scrapbook Adhesives by 3L Pinterest

Visit our Website and Blog!
Sign up for our Newsletter so you never miss a contest or giveaway!

instagram purple icon facebook icon purple pinterest purple icon twitter purple icon YouTube icon blog subscription purple icon

Swirly Circles Thank You Card

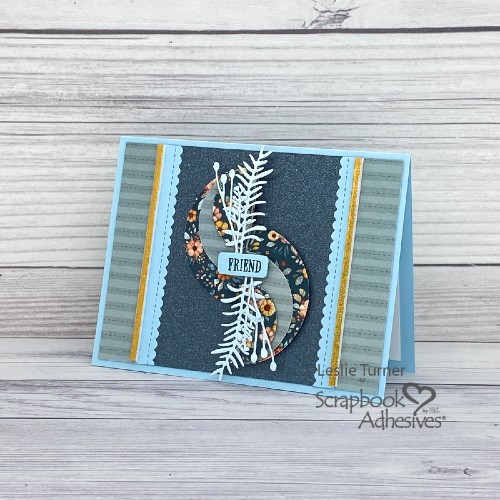
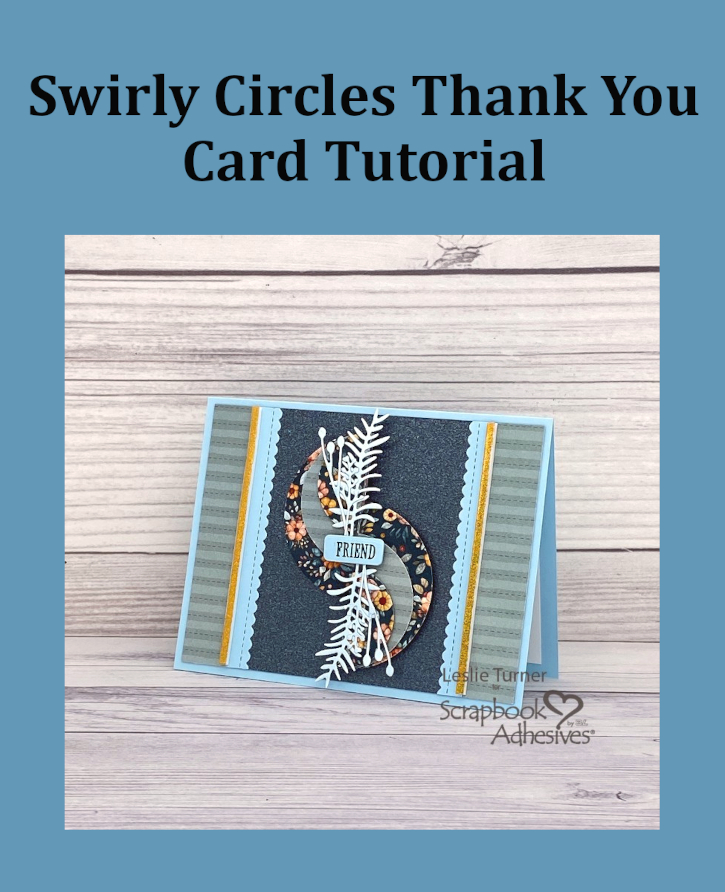
Happy Tuesday, friends! I hope your week has started off on a nice note! Have you ever heard of a swirly circles card element? It’s a fun one to make and gives the optical illusion of a spinning spiral! Leslie here, sharing a tutorial for making a Swirly Circles Thank You Card featuring a couple NEW Scrapbook Adhesives products – 3D Foam Squares 3mm White Mix and 3D Foam Strips 3mm White!

Swirly Circles Thank You Card by Leslie Turner for Scrapbook Adhesives by 3L

Yep, you read that right… we now carry 3mm thick foam squares and strips in white and black! Very excited to share this project using 1mm, 2mm and 3mm white foam squares, along with 3mm white foam strips and holographic transfer foil! You know I absolutely love the Wear Your Adhesive on the Outside technique! So let’s get started!

Create Swirly Circles Element

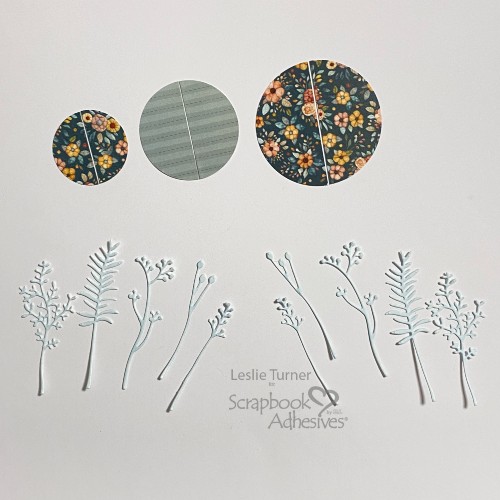
Punch 1-1/2″, 2″ and 2-1/2″ circles and cut each one in half. Circle dies can also be used. Die cut some garden stems. Wasn’t sure how many I would end up using, so I cut a variety to balance out the element.

Swirly Circles Thank You Card by Leslie Turner for Scrapbook Adhesives by 3L

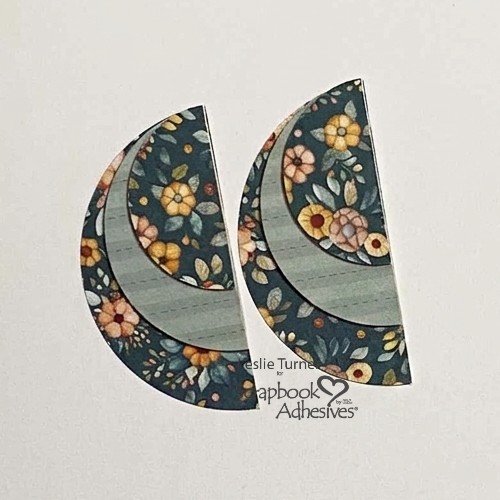
Use Thin 3D Foam Squares White Mix to adhere the halves of the circles together. Stack them with the smallest on top and line up the top corner and right straight edge. Do both sets the same way.

Swirly Circles Thank You Card by Leslie Turner for Scrapbook Adhesives by 3L

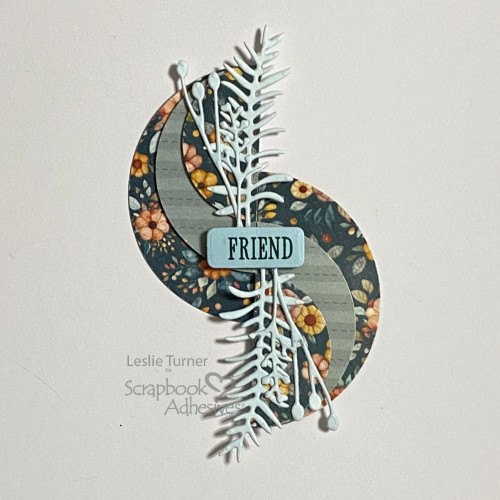
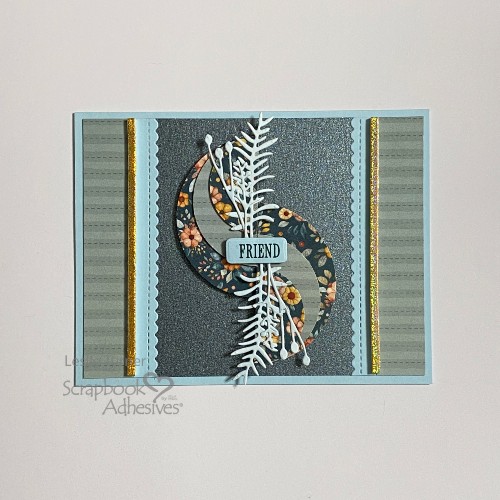
Rotate one set of halves 90 degrees and line up the center circles with the straight edges meeting in the middle. Apply a piece of washi tape to the back to hold them together. Add the garden stems with the Dual Tip Glue Pen. Affix the sentiment in the center with 3D Foam Squares White Mix (which are 2mm in height), and set the element aside.

Swirly Circles Thank You Card by Leslie Turner for Scrapbook Adhesives by 3L

Cut Card Base & Layers

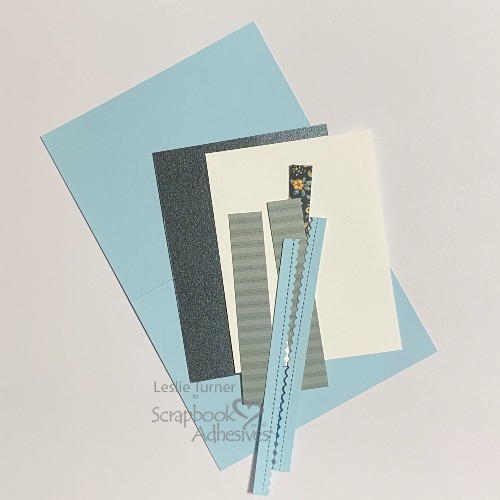
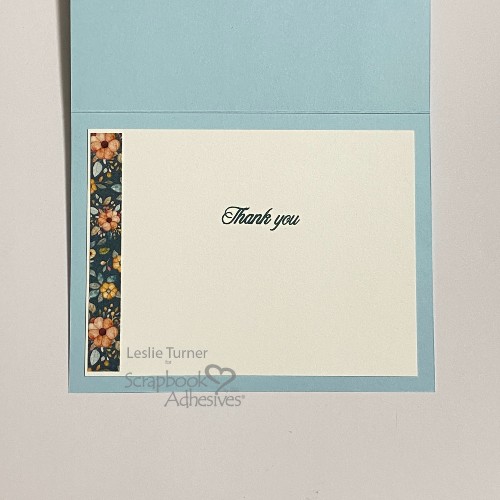
Now cut a 5-1/2″ x 8-1/2″ card base from light blue cardstock and score it at 4-1/4″ on the long side. Also, cut a 4″ x 5-1/4″ dark green layering panel and a 3-3/4″ x 5″ white sentiment panel (for the inside). Afterwards, cut two 3/4″ x 4″ striped strips and a 1/2″ x 3-5/8″ floral strip. Additionally, if you have stitched scallop dies (or a border punch), also cut two 4″ long light blue strips for the front.

Swirly Circles Thank You Card by Leslie Turner for Scrapbook Adhesives by 3L

Adhere Layers

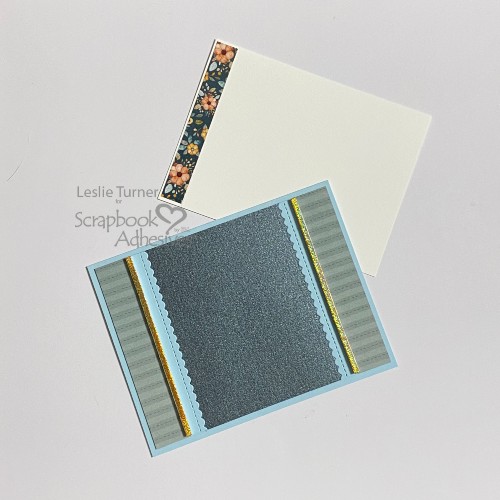
Grab the E-Z Runner® Ultra Strong Refillable Dispenser and adhere the dark green layering panel to the card base front. Similarly, adhere the striped strips and stitched scallop strips to this panel. Let’s employ the Wear Your Adhesive on the Outside technique… my favorite! Apply two 3D Foam Strips 3mm White vertically to the card front. Remove the liner, press gold glitter foil from the Metallic Transfer Foil Sheets Holographic Colors, and rub to secure. So easy and so beautiful! Don’t forget to adhere the floral strip to the white sentiment panel; this will be added to the inside of the card.

Swirly Circles Thank You Card by Leslie Turner for Scrapbook Adhesives by 3L

Affix Swirly Circles Element

Get that package of 3D Foam Squares 3mm White Mix and affix the swirly circles element to the card front. Wow, look at the dimension!

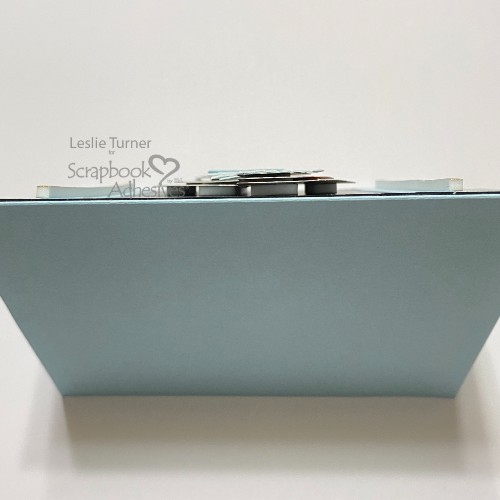
Looking down from the top of the card, check out the dimension using these new 3mm thick foam squares and strips! They are phenomenal!

Swirly Circles Thank You Card by Leslie Turner for Scrapbook Adhesives by 3L

Complete Swirly Circles Thank You Card

All that’s left to do is to stamp a sentiment on the white sentiment panel and adhere the panel with E-Z Runner® Ultra Strong Refillable Dispenser. This pretty swirly circles thank you card is complete!

Thanks for visiting!
Leslie

Creative Time: 35 mins
Skill Level: Intermediate

Materials Needed:
Scrapbook Adhesives by 3L®
E-Z Runner® Ultra Strong Refillable Dispenser
Thin 3D Foam Squares White Mix, 3D Foam Squares White Mix and 3D Foam Squares 3mm White Mix
3D Foam Strips 3mm White
Metallic Transfer Foil Sheets Holographic Colors

HomeHobby™ by 3L
Dual Tip Glue Pen

Other: Cardstock/Paper: CutCardStock Lessebo Arctic Blue and Stardream Metallic Neptune cardstock, Classic Crest 80# Solar White cardstock; Keep It Simple Cheerful Cottage 6×9 Papers
Stamps: Stampin’ Up! Perfectly Pears stamp set
Ink: Catherine Pooler Bay Breeze ink
Dies/Punches: Fiskars 1-1/2″ and 2-1/2″ circle punches, Stampin’ Up! 2″ circle punch; Cottage Cutz Garden Stems dies, My Favorite Things Stitched Scallop Basic Edges 2 dies, Stampin’ Up! Perfectly Pears dies
Accessories: Stampin’ Up! paper trimmer, Mini MISTI, Big Shot

Click Preferred Retailers List

Save to Pinterest!
Swirly Circles Thank You Card by Leslie Turner for Scrapbook Adhesives by 3L Pinterest

Visit our Website and Blog!
Sign up for our Newsletter so you never miss a contest or giveaway!

instagram purple icon facebook icon purple pinterest purple icon twitter purple icon YouTube icon blog subscription purple icon

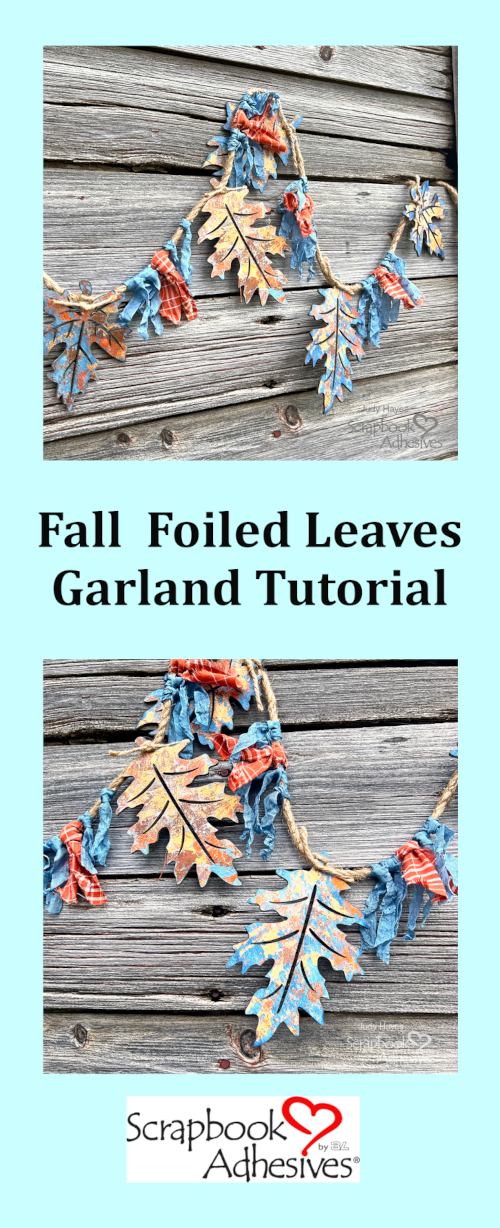
Fall Foiled Leaves Garland

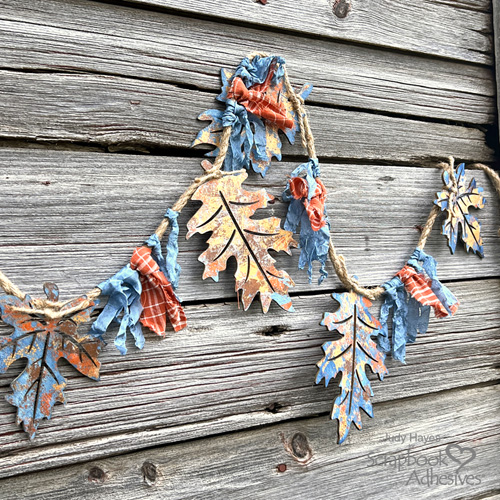
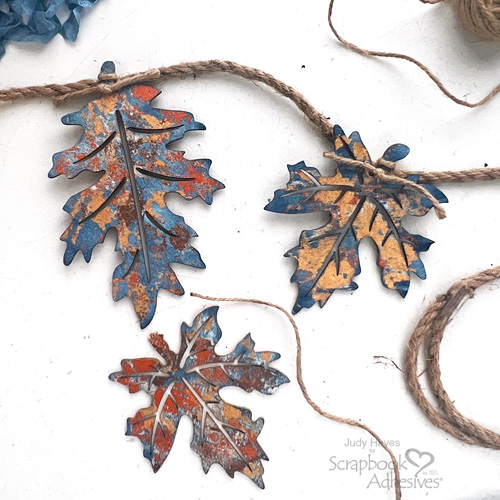
Hi, Judy here! This Fall Foiled Leaves Garland came out from shopping at a craft and home decor store with my sister. She suggested making a garland out of some wood leaves…well, who can resist a sibling challenge?! LOL! To add more elements, I picked out a slightly different Fall color combo by using blue with orange, inspired by the plaid fabric I found in a display of fall fabrics.

Fall Foiled Leaves Garland by Judy Hayes for Scrapbook Adhesives by 3L

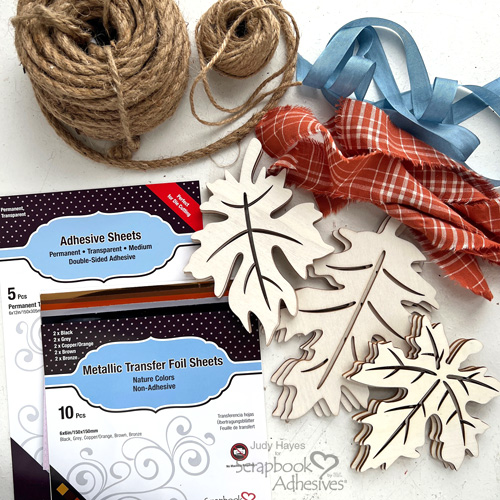
Gather Leaves Garland Supplies

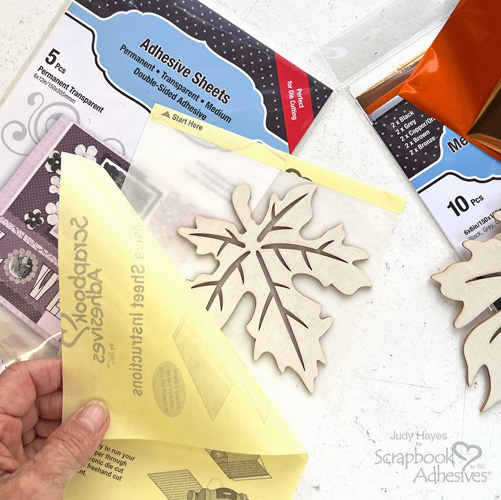
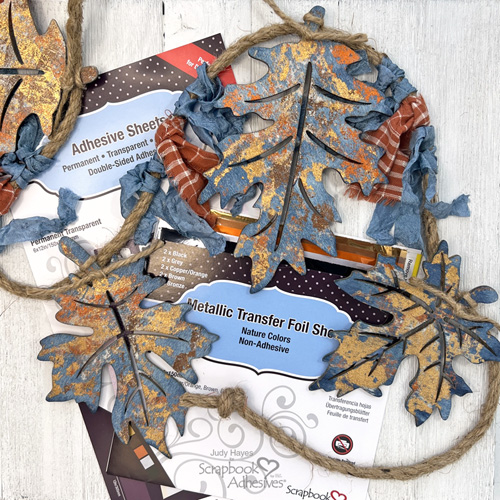
Along with the wood leaves and orange fabrics, I added heavy and medium weight twine, blue seam binding, Metallic Transfer Foil Sheets Nature Colors and Adhesive Sheets 6×12 inch.

Fall Foiled Leaves Garland by Judy Hayes for Scrapbook Adhesives by 3L

Wear Your Adhesive on the Outside with Adhesive Sheets

Peel back the liner from Adhesive Sheets 6×12 inch and place wood leaf on adhesive. Replace the liner, flip over and burnish over the leaf with a bone folder. Peel back adhesive sheet from leaf and place leaf on non stick craft mat. Note, the adhesive will not completely cover the leaf. Designer Tip: I found it easier to cut Adhesive Sheets 6×12 inch to fit each leaf as duplicated this process.

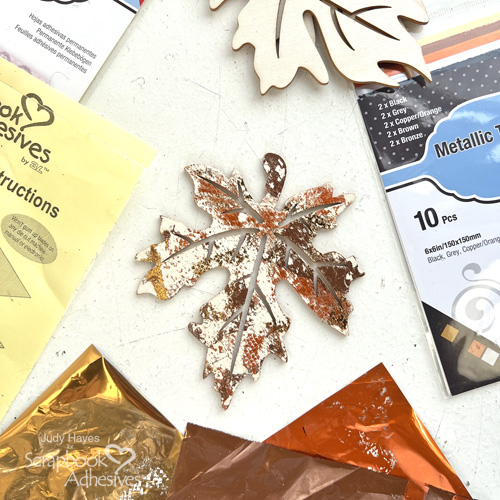
Use your thumb to press a portion of the Copper/Orange foil from the Metallic Transfer Foil Sheets Nature Colors (color side facing you) randomly on the leaf. Do not foil all of the exposed adhesive. Repeat with Brown foil and Bronze foil from the same foil pack until you get your desired look. Repeat these steps for the other side of leaf.

Add Another Layer – Ink

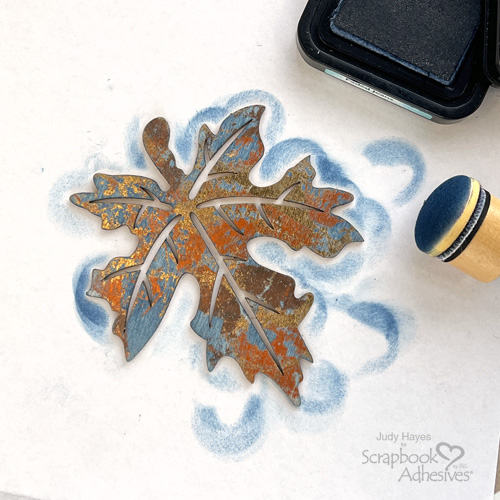
Apply ink with a foam applicator to cover areas without the foil on the leaf. It’s okay to rub over the foil as it will not absorb it. Simply wipe off the ink from the foiled areas with a paper towel. This works best on a non-stick craft sheet. Now, turn over the leaf and repeat the inking steps. Designer Tip: I recommend gloves for inking process. My fingers were quite blue when I got done.

Fall Foiled Leaves Garland by Judy Hayes for Scrapbook Adhesives by 3L

Seal with Clear Embossing

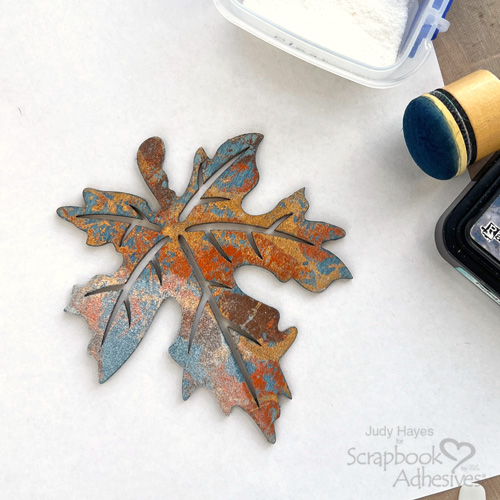
Working on one side at a time, cover leaf with clear embossing powder. Remove excess and melt with a heat tool. The clear embossing will seal any stickiness. Repeat to make a total of nine embellished leaves.

Fall Foiled Leaves Garland by Judy Hayes for Scrapbook Adhesives by 3L

Tie Leaves to Garland Base

Cut a piece of 8 feet long heavy twine and knot the ends to make a garland base. Position a leaf stem on the twine and with an 8 inch piece of medium weight twine, tie leave stem to the twine garland. Repeat with all leaves, spacing them about 9 inches apart.

Fall Foiled Leaves Garland by Judy Hayes for Scrapbook Adhesives by 3L

Finishing with Fabric Strips

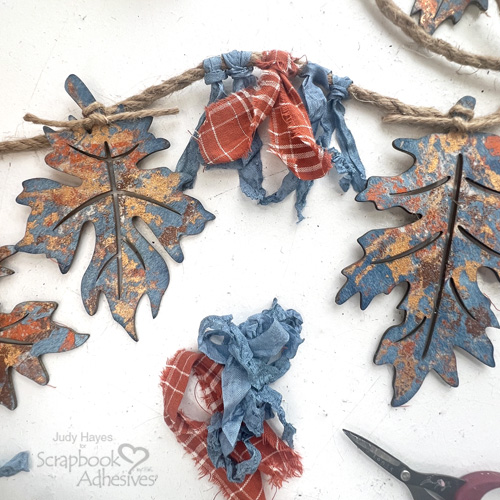
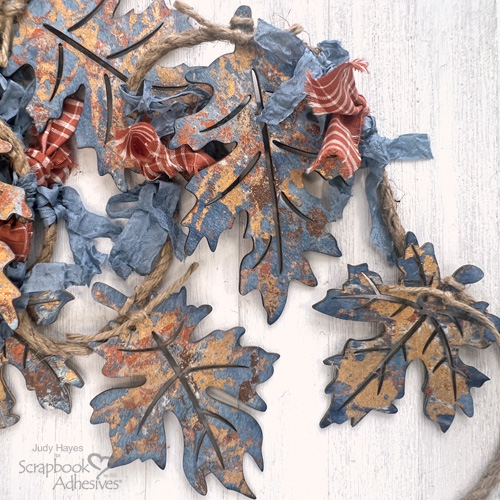
Cut fabric strips to about 1.5 inches wide and 8 inches long. Loop over garland twine centered between leaves.

Crumple blue seam binding by misting with water and wadding it into a ball in your hands. Shake out and allow to dry (or use hair dryer, heat gun to dry) Cut into about 8-9 inch lengths. Loop two on each side of fabric. Continue to add fabric and seam binding between all leaves.

I hope you enjoyed my Fall Foiled Leaves Garland tutorial and it inspires you to start creating some fall-themed home decor pieces. Share with us your take on this project by tagging us on Scrapbook Adhesives by 3L Instagram!

Thanks for stopping by!
Judy Hayes

Creative Time: 60+ mins
Skill Level: Intermediate

Materials Needed:
Scrapbook Adhesives by 3L®

Metallic Transfer Foil Sheets Nature Colors

Adhesive Sheets 6×12 inch

Other: Embossing Powder: Ranger Ink (Clear); Ink: Ranger Ink (Distress Faded Jeans); Wood Leaves (Hobby Lobby); Heavy and Medium Twine; Plaid Homespun Fabric; Blue Seam Binding

Click Preferred Retailers List

Save to Pinterest!
Fall Foiled Leaves Garland by Judy Hayes for Scrapbook Adhesives by 3L Pinterest

Howdy Mixed Media Tag Art

Hi there!!! Connie here with a fun Howdy Mixed Media Tag Art. It’s full of that wonderful dimension featuring 3D foam products. Great idea for those baked goods that require a special tag!!! Another win for tags!!! Plus it could get you into the kitchen:) Certainly worth thinking about.

Howdy Mixed Media Tag Art by Connie Mercer for Scrapbook Adhesives by 3L

3D Foam Butterflies on the Howdy Tag

Howdy Mixed Media Tag Art by Connie Mercer for Scrapbook Adhesives by 3L
  1. Lay 3D Foam Butterflies on tissue paper.  Remove backside of release paper.
  2. Wet the edges of the foam butterflies, with water, to soften the tissue paper.
  3. Wipe the water off and sand edges with a nail file.  Repeat for the second butterfly, then set aside.

Colorful Howdy Tag Background

Howdy Mixed Media Tag Art by Connie Mercer for Scrapbook Adhesives by 3L
  1. Get messy!! Create a mixed media style background using watercolors or a mix of Distress Oxide inks.
  2. Stamp images, in random spots, for added interest. Perfect time to add color and stamps to the 3D Foam Butterflies.

Assemble the Tag

Howdy Mixed Media Tag Art by Connie Mercer for Scrapbook Adhesives by 3L
  1. Adhere 3D Foam Circle Black Mix and 3D Foam Square Black Small to the back of the girl paper dolls and place on tag front.  Don’t forget the 3D Foam Butterflies!  They are ready to stick down, like a sticker but with dimension.
  2. The 3D Foam Strips Black are so perfect, for the back of the word strip, and then place on the tag.
  3. Add acrylic paint splatters to front of tag. Also, an old toothbrush works great with watered down paint.
  4. Fabric tag topper, with button and pear pen, completes the look!
Howdy Mixed Media Tag Art by Connie Mercer for Scrapbook Adhesives by 3L

I hope you enjoyed this Howdy Mixed Media Tag Art. Especially exciting for that special friend!!!

Thanks for stopping by!
Connie Mercer

Creative Time: 60 mins
Skill Level: Intermediate

Materials Needed:
Scrapbook Adhesives by 3L,
3D Foam Circles Black Mix, 3D Foam Strips Black and 3D Foam Squares Black Small
3D Foam Butterflies

Other: Paper Dolls and Tissue Papers: Tim Holtz; Stamps: Tracy Evans; Ink: Ranger Ink (Distress Oxide in Peeled Paint, Walnut Stain and Peacock Feathers) and Tsukineko (Versafine Ink in Black Onyx); Vintage Fabric; Button Pear Pin; Stickers.

Click Preferred Retailers List

Save to Pinterest!
Howdy Mixed Media Tag Art by Connie Mercer for Scrapbook Adhesives by 3L Pinterest

Visit our Website and Blog!
Sign up for our Newsletter so you never miss a contest or giveaway!

instagram purple icon facebook icon purple pinterest purple icon twitter purple icon YouTube icon blog subscription purple icon

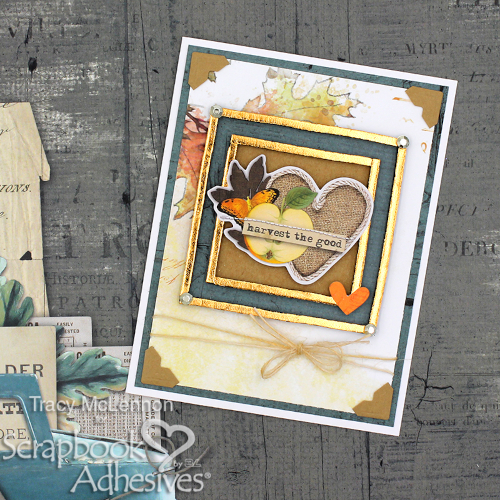
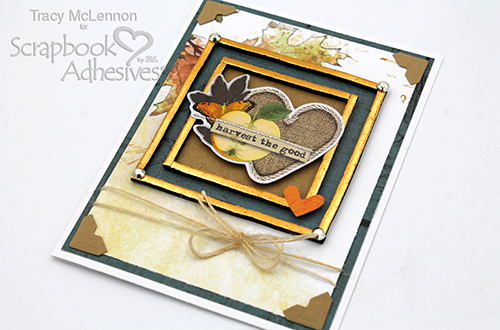
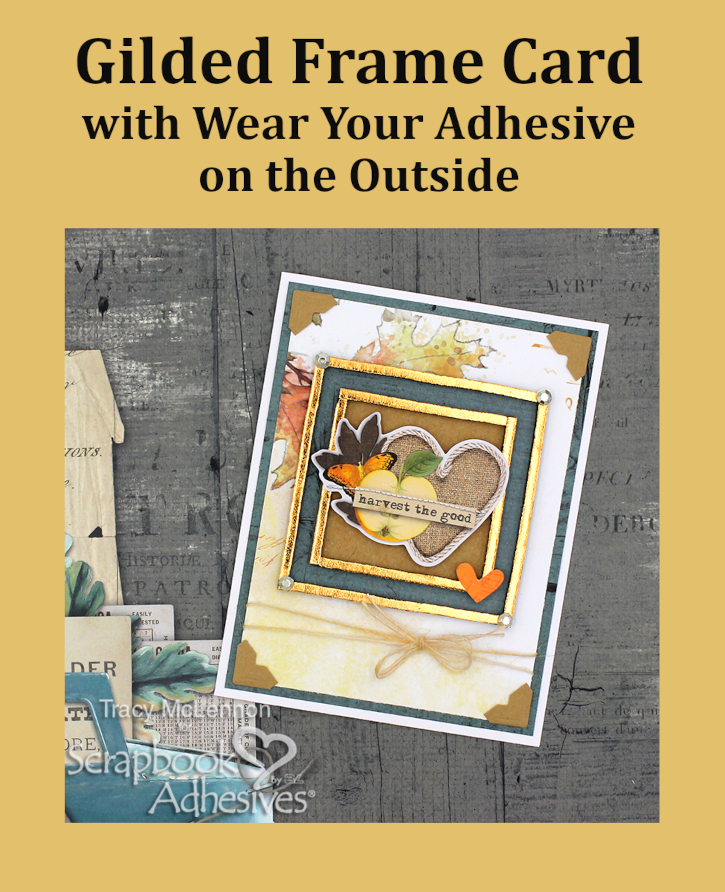
Gilded Frame Card

Hello crafty cardmaking friends! Tracy here, and today I have a pretty little Gilded Frame Card featuring the 3D Foam Strips 3mm Black. Here are all of the details on how I created it.

Gilded Frame Card by Tracy McLennon for Scrapbook Adhesives by 3L

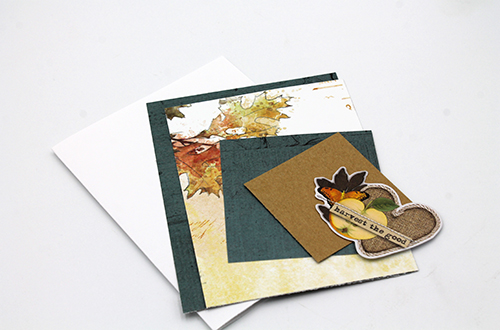
Basic Layers for the Gilded Frame Card

My first step was to cut all of the basic layers of this gilded frame card. This includes a white cardstock card base and two more patterned paper layers. Then a 2.5″ kraft cardstock square, and a patterned paper 3″ square.

Gilded Frame Card by Tracy McLennon for Scrapbook Adhesives by 3L

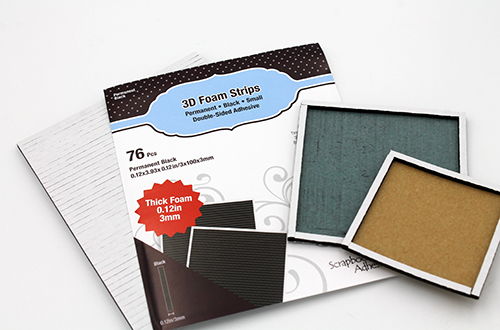
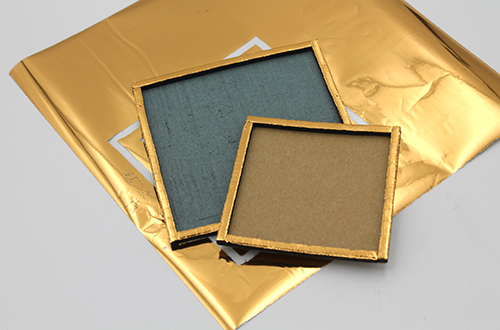
Let’s start the gilded frames. Using the 3D Foam Strips 3mm Black, frame the 2 square pieces and trimming off any excess.

Gilded Frame Card by Tracy McLennon for Scrapbook Adhesives by 3L

Now using the Metallic Transfer Foil Sheets Nature Colors, cover the 3D Foam Strips 3mm Black creating the gilded frame card pieces.

Gilded Frame Card by Tracy McLennon for Scrapbook Adhesives by 3L

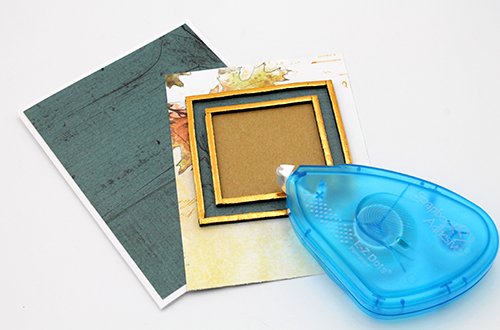
Adhere the flat layers together using the E-Z Dots® Permanent Dispenser. Leaving the 2 patterned pieces separate for now.

Gilded Frame Card by Tracy McLennon for Scrapbook Adhesives by 3L

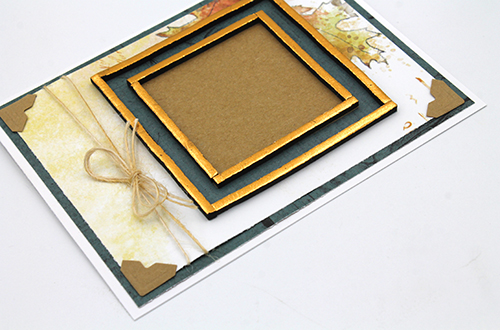
Add a burlap string bow to the bottom of the card front and then attach it to the card base using Creative Photo Corners Kraft.

Gilded Frame Card by Tracy McLennon for Scrapbook Adhesives by 3L

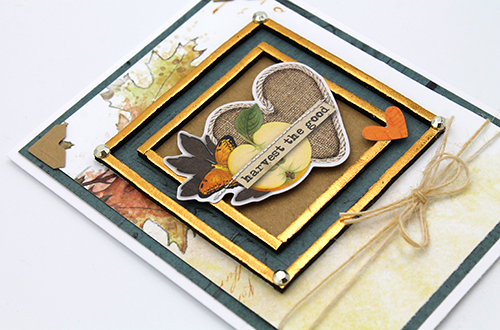
I added the sentiment ephemera to the card using some left over bits of 3D Foam Strips 3mm Black. Then I added the small heart using Adhesive Dots Micro. Add a few gems to the large frame to complete the gilded frame card.

Gilded Frame Card by Tracy McLennon for Scrapbook Adhesives by 3L

Thanks so much for stopping by!
Tracy

Creative Time: 30 mins
Skill Level: Intermediate

Materials Needed:
Scrapbook Adhesives by 3L®
Adhesive Dots Micro
3D Foam Strips 3mm Black
E-Z Dots® Permanent Dispenser
Creative Photo Corners Kraft
Metallic Transfer Foil Sheets Nature Colors

Other: Simple Vintage Autumn Collection; Burlap String; Gold Gems; Kraft and White Cardstock

Save to Pinterest!
Gilded Frame Card by Tracy McLennon for Scrapbook Adhesives by 3L Pinterest

Visit our Website and Blog!
Sign up for our Newsletter so you never miss a contest or giveaway!

instagram purple icon facebook icon purple pinterest purple icon twitter purple icon YouTube icon blog subscription purple icon